


Contents
- 1 Why Proper Litter Box Cleaning Is Crucial
- 2 Step 1: Gather Essential Supplies
- 3 Step 2: Scoop the Litter Box Daily
- 4 Step 3: Weekly Deep Cleaning Routine
- 5 Step 4: Refill with Fresh Litter
- 6 Step 5: Position the Litter Box Correctly
- 7 Step 6: Additional Tips for Odor Control
- 8 Step 7: Handling Multiple Cats and Special Cases
- 9 Common Mistakes to Avoid
- 10 Conclusion
Cleaning a litter box may seem like a straightforward chore, but for beginners, it often feels daunting and unpleasant. Proper maintenance of your cat’s litter box is essential-not only for your cat’s health and comfort but also for maintaining a hygienic and odor-free home environment. In this comprehensive guide, we will walk you through the best way to clean the litter box, step-by-step, with expert tips and techniques designed to make the process efficient, thorough, and stress-free.
Why Proper Litter Box Cleaning Is Crucial
Before diving into the cleaning process, it’s important to understand why diligent litter box maintenance is a must. Cats are naturally clean animals, and a dirty litter box can cause them to avoid it, leading to accidents around your home. Moreover, poor litter box hygiene can cause unpleasant odors, attract pests, and potentially expose you and your pets to harmful bacteria and parasites.
Regular cleaning helps to:
- Maintain your cat’s health by preventing infections and urinary tract diseases.
- Reduce odors that can quickly build up in enclosed spaces.
- Encourage consistent litter box use by your cat.
- Ensure a pleasant living environment for you and your family.
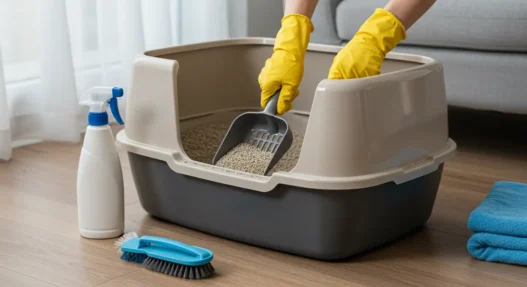
Step 1: Gather Essential Supplies
Before starting, gather all the necessary tools and supplies. Having everything at hand will streamline the cleaning process and help avoid cross-contamination.
You will need:
- Disposable gloves to protect your hands from germs.
- A scoop with a fine mesh to catch clumps and waste.
- Mild, unscented soap or specialized litter box cleaner.
- Warm water for washing.
- Paper towels or clean cloths for drying.
- A trash bag or bin for disposal.
- Baking soda or a natural deodorizer (optional).
- Replacement litter. You may be interested in our Top 5 Glass Olive Oil Sprayers for Cooking article.

Step 2: Scoop the Litter Box Daily
The foundation of keeping the litter box clean lies in daily scooping. Removing clumps of urine and feces promptly prevents waste from accumulating and reduces odor buildup.
- Use a scoop designed for your type of litter (clumping or non-clumping).
- Scoop out all solid waste and clumps of urine.
- Transfer waste to a sealed trash bag or bin.
- Avoid flushing litter waste down the toilet, as this can cause plumbing issues.
Daily scooping not only keeps the litter box cleaner but also allows you to monitor your cat’s health by checking for any changes in waste.
Step 3: Weekly Deep Cleaning Routine
In addition to daily scooping, a weekly deep cleaning of the litter box is vital to maintain hygiene and prevent bacterial growth.
Empty the Litter Completely
- Wear gloves and dump all the used litter into a trash bag.
- Dispose of the litter according to your local waste guidelines.
- Avoid mixing old and new litter; always use fresh litter after cleaning.
Wash the Litter Box Thoroughly
- Rinse the box with warm water.
- Use mild, unscented soap or a gentle cleaner specifically designed for litter boxes. Avoid harsh chemicals like bleach, which can leave residues harmful to cats.
- Scrub all corners and crevices with a brush or sponge to remove stuck-on waste and residues.
- Rinse thoroughly to remove all soap traces.
Dry Completely
- Wipe the box dry with paper towels or a clean cloth.
- Allow it to air dry if possible to ensure no moisture remains, which could cause litter clumping or bacterial growth.
Step 4: Refill with Fresh Litter
- Pour fresh litter into the clean, dry box.
- Fill the box to a depth of about 2 to 3 inches, depending on your cat’s preference and the type of litter.
- For clumping litter, maintain the proper depth to allow efficient clumping and easy scooping.
- Consider sprinkling a thin layer of baking soda under the litter to help neutralize odors naturally.
Step 5: Position the Litter Box Correctly
Where you place the litter box is just as important as how you clean it.
- Choose a quiet, low-traffic area for your cat’s privacy.
- Avoid placing the box near their food and water bowls.
- Ensure easy access and good ventilation.
- Consider multiple boxes if you have multiple cats (one box per cat plus one extra is the general rule).
Step 6: Additional Tips for Odor Control
Even with regular cleaning, odor can sometimes persist. Here are some expert tips to keep your home smelling fresh:
- Use unscented or lightly scented litter to avoid irritating your cat’s sensitive nose.
- Regularly sprinkle baking soda or activated charcoal at the bottom of the box.
- Clean the surrounding area with mild disinfectant wipes.
- Wash scoop tools regularly.
- Change litter boxes every 6 to 12 months depending on wear and odor retention.
Step 7: Handling Multiple Cats and Special Cases
For households with multiple cats, keeping the litter boxes clean requires extra attention:
- Provide multiple litter boxes to reduce overcrowding.
- Scoop boxes more frequently, ideally twice a day.
- Consider automated self-cleaning litter boxes if manual cleaning becomes overwhelming.
If your cat has special needs (e.g., elderly cats, kittens, or cats with health issues), choose litter and box types that are easier to access and clean frequently to maintain hygiene and comfort.
Common Mistakes to Avoid
- Using harsh chemicals: Avoid bleach or ammonia-based cleaners as they can harm your cat.
- Neglecting daily scooping: Waiting too long can cause odors and discourage your cat.
- Not washing the box regularly: Over time, residues build up and trap odors.
- Overfilling or underfilling the box: Both can cause discomfort and litter tracking.
- Ignoring the box location: A noisy or busy spot will deter your cat from using it.
Conclusion
Cleaning the litter box is an essential responsibility for any cat owner and mastering the best techniques will ensure a healthier, happier home for you and your feline companion. By following daily scooping, performing weekly deep cleanings, using the right supplies, and positioning the box thoughtfully, you can maintain a fresh, odor-free environment and support your cat’s wellbeing.
Remember, a clean litter box is a key part of responsible pet ownership and contributes greatly to the comfort of your household.
BUY Neakasa M1 Open-Top Self Cleaning Cat Litter Box on Amazon